Data-centric applications normally have to display a lot of information and Android has two important widgets which can be used to display a lot of information in a small space:
- Spinner: We have used a spinner when developing the Forex app previously. We have seen how it needs an adapter to display its data.
- ListView/RecyclerView: This is a scrollable list of items which can be clicked on. ListViews/RecyclerViews also require an adapter to work.
In the previous lesson on databases we developed the Song Explorer app which basically retrieves a list of artists and tracks from a database and displays it on the screen using a TextView. However, using a TextView for this purpose has some limitations. For instance, we cannot select one specific item and click on it to get more details. The best way to display a list of items in Android is to use a ListView/RecyclerView.
ListView vs RecyclerView
When using lists to display data, you need to get references to each view component for each item in the list. If your list has only a few items that’s fine but if your list has let say hundred items, repeatedly calling findViewById() can slow down performance and as a result the scrolling experience won’t be smooth. To address the issue, it is recommended to use a pattern called the ViewHolder pattern which basically recycles views when they go out of the screen when you scroll. So instead of creating new view components for each item in the list, we reuse those which are not displayed on the screen.
Previously, one could make ListView scrolling smooth by implementing the ViewHolder pattern in the corresponding ListView adapter. However, this was an optional thing. With the advent of Android Lollipop, RecyclerView was introduced. RecyclerView is a much more powerful, flexible and a major enhancement over ListView. For instance, RecyclerView makes the use of ViewHolder compulsory using the RecyclerView.ViewHolder class. It also has additional functionalities for item animation and item decoration among others.
Song Explorer v4

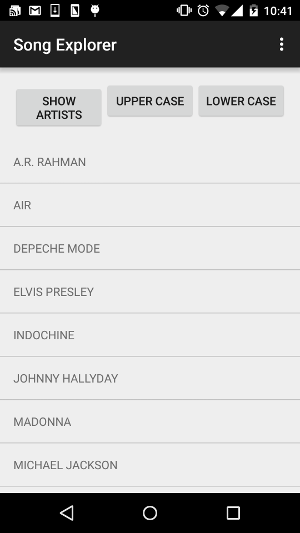
Here, we’ll develop version 4 of the Song Explorer app. Instead of displaying the list of artists in a TextView, we’ll display it using a nice RecyclerView. For that, we’ll also have to create ArtistAdapter class which will extend RecyclerView.Adapter.
Song Explorer v5
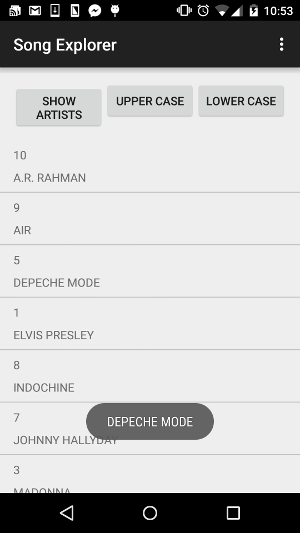
Till now, we have only displayed the artist name. However, in the database, we also have the artist id and the artist bio. In Android, it is possible to customise lists to display more than one piece of information for each item in the list. For example, for one item, we can display a thumbnail image to the left and other pieces of information to the right of the image. In version 5 of the app, we learn the basics of creating custom lists by displaying the artist id together with the artist name.
Song Explorer v6

In version 5 of the Song Explorer app, we have a nice RecyclerView displaying a list of artists which includes the artist’s id and the artist’s name. As mentioned previously, one interesting feature of using ListViews/RecyclerViews is that we can click on a specific item in the list. Till now, when clicking on a specific item, nothing happens. In version 6, when clicking on a specific item, the name of the artist is displayed in a Toast.
Song Explorer v7
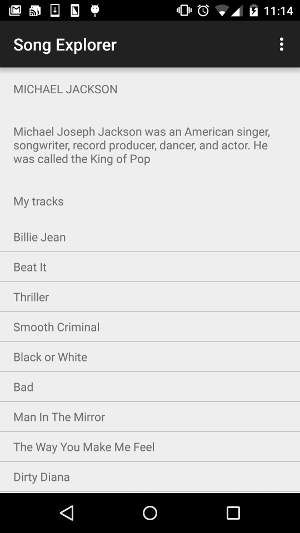
As you are probably guessing, displaying the name of the artist in a Toast is not very useful. In version 7, when clicking on an item in the list, we display more details about that particular artist (i.e. artist name, bio and tracks)on a different screen. To achieve this, the following needs to be done:
- Create a new activity, ArtistDetailsActivity, and add it to the AndroidManifest.xml file
- Update the onClick() in ArtistAdapter to start the new activity and pass in the artist id
- Get the artist id in the new activity (ArtistDetailsActivity) and retrieve the corresponding artist name and bio from the database and display those in two respective TextViews
- Retrieve the list of tracks for that particular artist from the database
- Create a RecyclerView and a corresponding TrackAdapter to display the list of tracks for the artist

Song Explorer v8
The last enhancement to bring to the application is to allow the user to specify whether the list of artists should be sorted by the artist id or by the artist name. The next time the application starts, the list should be displayed in the chosen order. To do that, a preference screen should be created using the XML editor, then a class (SettingsActivity) derived from PreferenceActivity should be created and the onCreate method overriden. This new activity should be manually added to AndroidManifest.xml.
When this activity is launched (using, for example, startActivity), the Android framework will automatically store the preferences.
Here, the preference screen will be launched when the user select settings in the menu which can be accessed through the bar at the top (also known as the action bar). To do this, startActivity() should be called accordingly in the onOptionsItemSelected() method in MainActivity.
You will notice that the preference screen doesn’t have the action bar at the top. This is because unlike MainActivity, SettingsActivity extends PreferenceActivity instead of AppCompatActivity. We will see later on what AppCompatActivity is all about and how to add an action bar to SettingsActivity too.
Finally, the application will have to be updated to display the list of artists in the appropriate order based on the user’s selection. The way to do that is to get a SharedPreference object from the PreferenceManager, retrieve the corresponding setting value and use the appropriate SQL statement when querying the database.
Leave a Reply